Sublimation Transfers
Today i will let you know everything about what is sublimation transfers and how it does work in sublimation process.
Alternatively referred to as dye sub transfer printing, sublimation transfers give artists a flexible method of applying full color designs to a variety of materials, including metal, wood, slate, polyester textiles, and polymer-coated ceramics.
Vibrant and durable print effects are made possible using solvent-disperse dyes, which are first printed onto a release paper before transferring to the permanent substrate when heated. This process is not possible with conventional imprinting procedures.
The definition of sublimation transfers, their workings, recommended practices for optimum image quality, project ideas, business potential, and frequently asked questions for those making their first dye sublimation prints are all covered in this comprehensive look at engineering and applying sublimation transfers.
What Are Sublimation Transfers?
Sublimation transfers, also called dye sub transfers or sublimation image transfers, are made up of cut or full sheet images printed using disperse dye inks onto transfer paper that is meant to be transferred onto other products or surfaces such as wooden boards, mugs, t-shirts, and anything else that can absorb dyestuff that is heated.
To ensure that the pictures appear correctly oriented when transferred, the method first mirror prints the images in reverse arrangement using specially formulated ink and paper.
Under heat, the inks turn into a gas and stick securely to ceramics, polymer fibers, and other materials while the paper shields the print.
Afterwards, finished products permanently absorb inks to achieve incredibly vibrant and durable coloring.
Sublimation printing, a digital transfer method, creates continuous tone, full color, photo-quality images. Replacing spot colors or RGB color values shows excellent accuracy and vibrancy when output on large scale.
Sublimation produces polished, professional effects with less equipment needed, unlike traditional custom print methods that can result in jumbled screen printing inks or uneven serigraphy results.
How Sublimation Transfers Work?
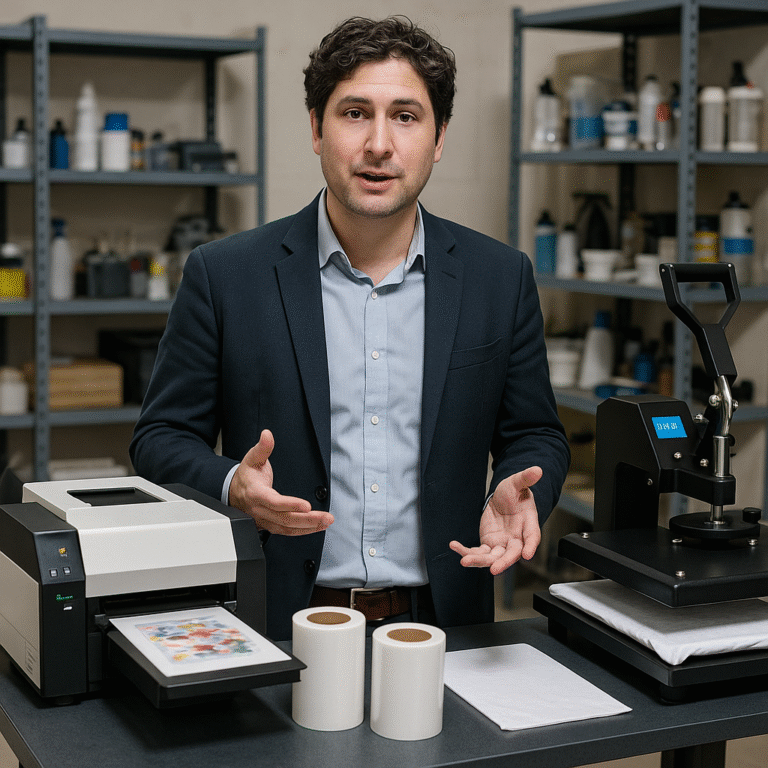
Sublimation transfer paper is made by companies such as BestSub, SubliStuff, and Coastal Business and is intended for use with solvent inkjet printers. Packages include precut sheets or continuous rolls that, when pressed upon surfaces that absorb color, release heat-sensitive print dyes.
Transfer sheets are made of smooth, high tension release paper coated with specialty adhesives. When transferring, this foundation maintains color saturation without bleedthrough or spreading, guaranteeing well-defined edge registration.
Common writing paper, on the other hand, absorbs too much solvent and warps when fed through aqueous inkjet machines.
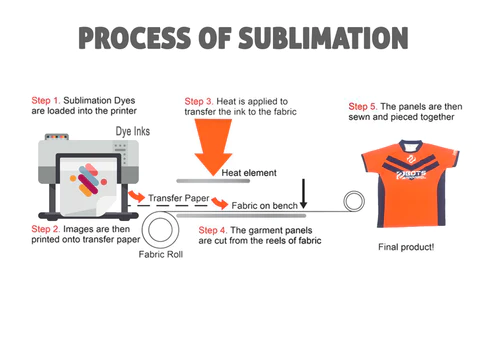
While printers with extended color sets like red, blue, green, light cyan, light magenta, and gray are perfect for creating rich and continuous color tones without banding, printers must support at least cyan, magenta, yellow, and black water-based pigments.
To ensure correct reading of pictures when applied thermally during the second bonding phase, printheads apply disperse dyes in a mirrored reverse configuration.
Sawgrass Technologies and Sublijet are the companies that usually sell sublimation toners, which are made up of large amounts of dispersed dye solids suspended in a stable liquid phase.
Similar to laser printing, their presses apply granular particles in the four process colors, and special transfer paper gathers the resulting imprints.
Step-by-Step Guide To Using Sublimation Transfers:
Once graphics have completed initial printing, these fundamental processes are followed to apply quality sublimation transfer prints onto the wide range of suitable consumer items, industrial products, and manufacturing substrates.
1) Cut edges or trim entire sheets of sublimation transfer paper using sharp scissors or an automatic thermal cutter to the proper size required for heat pressing.
2) Target substrate should be pre-pressed for 30 seconds, removed, and then the color side should be laid down with the image facing the material. Use hot tape to keep the corners from moving.
3) Before shutting the heat press over the assembly, shield the print with non-stick release paper to avoid direct contact damage during the phase transition.
4) In order to initiate bonding, use a lock press with high pressure that is suitable for the substrate density being imprinted upon at the right temperature and time.
5) After the assembled layering paper, dye carriers, and decorated product have completely cooled, remove the transfer sheet with caution, since it has now lost all of its color.
6) Before using, an optional final rinse in cold water removes any remaining unabsorbed surface dye, and it is then allowed to air dry.
Testing to determine the ideal heat binding parameters distinguishes truly premium, attention-grabbing sublimated imprints from mediocre prints that seamlessly blend into the products themselves for long-lasting improvement.
Which Items are Ideal for Sublimation Transfers?
Printers use additional substrates capable of absorbing and dispersing dyes once they are activated by enough heat for the specified amount of time at calibrated intensities for that density of material while pressing sublimation transfers. Typical goods consist of:
1) Polymer Resin Products: Producers apply a liquid polyurethane coating to consumer goods such as mugs, plates, boards, tiles, and keychains, which solidifies into a long-lasting plastic finish that is easily absorbent of sublimation dyes.
Even drinkware made of metal is frequently finished with powder polymer to allow for vibrant impressions. The assembly line efficiency of the outcomes outperforms pad or screen printing, making them perfect for modifying inexpensive imports.
2) Wood Composites: When crafting woods for indoor signage or durable outdoor furnishings, such as birch, aspen, and baltic ply, these woods take disperse inks equally well.
Stunning wood grain effects combine patterns, logos, and designs presumably into the wood itself rather than only on the surface, so long as at least 65% polyurethane resins catalyze within.
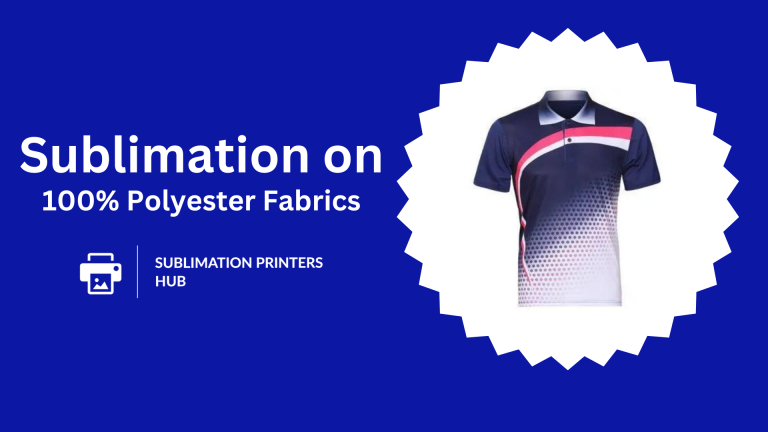
3) Polyester Fabric: When heat-treated, embedded dyes form a strong bind with the molecular structure of poly-fibers, melting images into the threads themselves to provide a photorealistic finish.
Small quantity apparel, ornamental merchandise, and specialist sewing tasks are dominated by imprinting onto coated textiles, which can be found in mouse pads, baggage tags, fleece coats, baseball caps, and other items.
4) Hard Substrates: When pressing transfers under the ideal heat ranges of 390°F to 420°F for these denser, non-porous materials, coated metals, plastics, glass plaques, fiber-reinforced leathers, and smooth or textured acrylics permanently infuse dyes into their initial microns. Ideal for awards, doors, displays, and plates.
When pressing high-quality transfer sheets, almost every item that has a pre-treatment polyurethane finish during production easily absorbs and disperses dye particles.
Using this indirect process, manufacturers reduce the amount of otherwise labor-intensive preparation required for unique surfaces to absorb enough colorants.
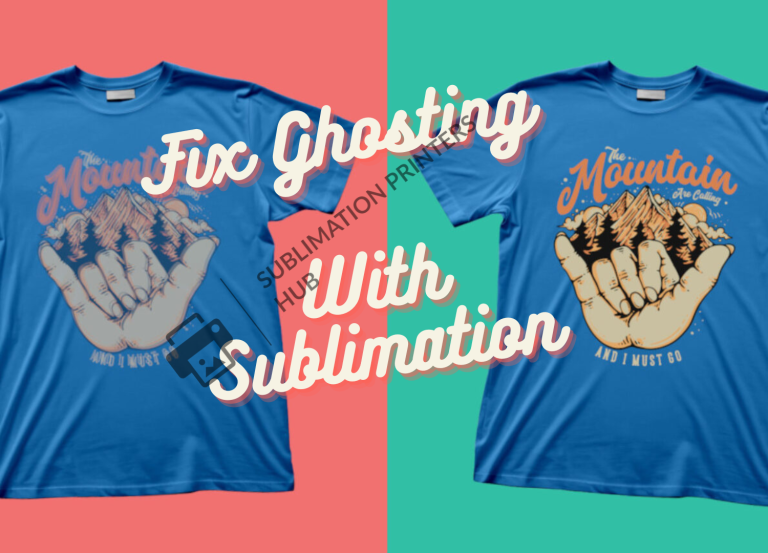
How to fix ghosting in sublimation?
Tips for High Quality Sublimation Transfer Results
It is necessary to match ideal fabrication parameters, such as printer color profiles, transfer paper compositions, process temperatures, and suitable substrate coatings, in order to achieve stellar imagery.
When troubleshooting poor transfers, keep the following important checklist items in mind:
1) Extend dwell length at least 15% over typical rates if using softer materials or lower temperature xylon board to allow for proper heat penetration.
2) Use polyester corner anchors under papers when pressing onto unknown textiles to compare perfect results to the unknown material.
3) Print color palettes in split and composite modes, assessing gradation banding to determine the optimal half toning and dithering for the device printheads that apply the inks.
4) Prior to starting production projects, always test new batches of transfer paper by burning a test pattern swatch to ensure optimal settings and flawless release.
5) Create transfer papers with ample bleed zones that extend beyond the final trim lines to ensure flawless edges after cutting with error-absorbing flexibility.
6) Instead of depending solely on the controller readout for accurate calibration, invest in a laser guided infrared thermometer to spot verify exact temperatures throughout the whole lower heating platen.
When results are examined closely and optimum subordinate recipes are established before to production scaling, perfect graphics are smoothly integrated into any product that can be imagined.
Awesome Sublimation Transfer Ideas You Should Try
Affordably priced printable blanks along with easily accessible solvent inkjet printers opened up a world of creative possibilities for budding designers and craft marketers looking to produce personalized presents in small quantities, ranging from garments to home décor, straight out of their own workshops.
For those who are new to transfer printing, these project guides are a great resource:
1) Disperse Ink Greeting Cards: To spread cheer and highlight the creative potential of this versatile imprinting process, transfer happy seasonal images onto cardstock, mount onto folded blank inserts, and match with printed envelopes.
2) Custom Sublimation Apparel: Add colorful, tapering patterns to the collars, back panels, and sleeves of cotton-polyester t-shirts, halter tops, and undergarments to distinguish your boutique styles from online mass-market items.
3) Dye Sublimation Throw Pillows: Using printed poly fabrics tucked within washable, reusable covers, pattern both sides of accent pillows in layered themes that are either matching or contrasting for maximum comfort and visual appeal.
4) Baby Onesies: As a sincere handcrafted gift, commemorate a newborn’s arrival by personalizing baby clothes with their name, birth details, and weight written boldly across the back. Combine the parents’ spirit animal totems on each sleeve.
5) Sublimated Tile Murals: Create eye-catching backsplashes or wall coverings that can resist dampness and decades of admiration by fusing high-resolution photographs, recognizable pop art, or abstract geometric patterns across ceramic and porcelain tiles.
6) Pet apparel and accessories: Showcase your cherished canines and felines with vibrant bandanas with their pictures and humorous captions to make their owners smile. These items may be found on coats, leashes, and harnesses.
The uses are only limited by your creativity. Instead of using flat vectors that are better suited for screen printing or vinyl cutting, emphasize graphics that pop with subjects that benefit from complete photographic tone.
Fine gradations in portraits, landscapes, cityscapes, and any other area where artwork is enhanced by finely blended hues are where sublimation truly shines.
Common Questions About Sublimation Transfer Printing:
These commonly asked questions offer crucial Need to Know information for designers investigating dye sublimation’s possibilities for creating customized goods on demand, whether they are working professionally or just for fun:
The following are the essential steps for successful heat press sublimation transfers:
Supplies Required:
* Transfer paper with sublimation printing
* Sublimation item – typically a polyester or polymer coated object
* Using a heat press
* Nonstick baking sheet
* Tape that is resistant to heat
Sublimation Transfer Pressing:
1) If necessary, cut your printed transfer paper to a size slightly larger than your final print size.
2) Preheat your heat press to 350-400°F, which is the recommended temperature for most sublimation blanks.
3) Lay the item to be sublimated flat on the heat press’s lowest platen.
4) Gently press the print side of the transfer onto the item, print side down.
5) Use heat resistant tape to seal the edges of the transfer paper. This eliminates shifting.
6) Place a nonstick sheet on top of the transfer paper. This keeps you from coming into direct contact with the upper heating element.
7) Close your heated press carefully, securing it in place over your item with even, balanced pressure across the surface.
8) Heat for 40-60 seconds at medium-high pressure, per the manufacturer’s instructions for the material being pressed.
9) After the press has cooled enough to handle, remove the nonstick layer and gently peel away the sublimation paper.
10) A final wash in cold water, if desired, eliminates any dye residue. Allow the item to dry completely before using it.
To optimize time, temperature, and pressure variables, some fine-tuning and testing is required. Take notes so that you can produce high-quality prints every time. Also, don’t be afraid to ask for help with your heat press in online groups!
Here’s a step-by-step tutorial for printing sublimation transfers:
Supplies Required:
– A sublimation printer (complete with sublimation inks).
– Paper for sublimation transfer
– Using a heat press
– Sublimation item: typically a polyester or polymer coated goods such as a cup, tile, etc.
Sublimation Printing Transfers:
1) In a graphics software programme, create your design and size it to fit your transfer paper sheets or the item you want to sublimate.
2) Install your sublimation printer according to the manufacturer’s instructions, using appropriate sublimation inks and transfer paper.
3) Because your design will be transferred to the sublimation substrate later, print it in reverse on several transfer papers. Examine the transfer paper guidelines.
4) Place transfer paper in the paper tray with the printable coating side facing up and the printable side facing down.
5) Print your designs with adequate drying time to avoid blurring damp prints.
6) Trim whole transfer sheets or cut a tiny border around your printed artwork. Touching the printed area should be avoided.
7) Place your sublimation blank into your heat press, whether it’s a polyester shirt, ceramic mug, wood, metal, or other item.
Preheat your heat press to the required temperature for that material.
8) Place the print face down on the substrate, gently tapping the corners to smooth and prevent trapped air.
9) Heat press the transfer onto your item using light pressure and the recommended time parameters.
10) Allow to cool completely before using! Take pleasure in your sublimated masterpiece, which now has the design permanently entrenched.
It may take some trial and error to find the best times and temperatures. Always consult your equipment’s instructions, but don’t be afraid to seek advice from internet groups!
There are several common reasons why sublimation transfers may not be correctly transferring from paper to the chosen substrate:
1) Insufficient Temperature: Ascertain that your heat press, oven, or other heat source reaches temperatures ranging from 380°F to 420°F. Any value lower than this prevents the dispersed dyes from gassing and bonding.
2) Inadequate Time: Dwell time for proper transfer varies depending on material thickness but ranges between 40 and 70 seconds on average. Inadequate time allows for incomplete infusion into the substrate.
3) Absence of Pressure: For flat goods like mug wraps, use firm, uniform pressure and an adequate heat press. Uneven contact keeps some of the print from bonding.
4) Printing Error: If you print yourself, make sure the print mirrors are properly aligned and that you utilized sublimation inks rather than ordinary inkjet inks, which fail to gasify.
5) Substrate Incompatibility: Check to see if your material is polyester or polymer coated, such as ceramics, metals, or treated wood. Other materials will not absorb dispersed pigments properly.
6) Faulty Transfer Paper: Dye release is hampered by old or damp transfer paper. When not in use, keep sheets wrapped in bags to retain sharp transfers.
Basic diagnostics for time, temperature, and pressure factors often rapidly show underlying reasons of image transfer failure and lead suitable modifications to ensure press flawless prints every time. Please let us know if any inconsistencies persist!
Sadly, when used for sublimation, regular writing paper and even expensive 24 pound photo inkjet sheets will not work, leaving flowing colors that are incapable of bonding. Proprietary coatings applied to high-quality transfer papers enable temporary dye suspension and subsequent complete release upon heating. Additionally, they can tolerate temperatures of 400°F/205°C, which would burn conventional stocks.
Damp sheets present minimal handling risks during the transfer paper step, other than some stains prior to pressing. However, if an accident results in bare inks coming into contact with furniture or surfaces, clean the area right away with warm, soapy water and then gradually apply hydrogen peroxide. Dab, never rub, to lift the pigments so they don’t oxidize over the next few hours and become more permanently embedded, necessitating professional cleaning.
While both laser and inkjet printers provide satisfactory output transfers, inkjets are able to produce gradient tones more precisely because of their variable-sized droplet-laying piezoelectric printheads. To avoid paper jams, look for CMYK devices with a straight paper route, such as the Ricoh and Sawgrass desktop printers with sublimation-specific ink sets, the Epson Surecolor EXX70 series, and Canon PIXMA IX models.
Yes, without a doubt. Epson’s EcoTank models, such as the ET-5800, include sizable refillable ink reservoirs that reduce operating expenses, making them perfect for larger-scale transfer printing. Additional light cyan, light magenta, and gray ink models result in even smoother color blends and precision, making them ideal for selling goods with photographic sublimation transfers imprinted on them.
High concentrations of dispersed dye solids, which evaporate when heated, are suspended by sublimation inks, enabling the colors to interact molecularly with poly fibers and substrates coated in polymers. Because pressed dyes stay vivid for decades, while surface inks just lay on top of materials ultimately fracture and fade, this permanent infusion produces significantly more lifelike artwork.
Yes, while light pastels and whites stand out the most for letting light flow through the infused dyes, newly created poly textiles with patented dye receptor coatings sublimate onto mid- to dark-toned materials just as well without sacrificing contrast or image clarity. This innovation increased the textile industry’s printing options.
The permanent absorption of sublimation straight into the molecular structure of synthetic fibers and polymer resins is one of the biggest benefits over analog decorating processes. If taken care of, this bonding will not fade or break under normal use for decades or even centuries, keeping the vivid colors and clarity from the first day.
Regretfully, nylon polymers are unable to absorb or distribute pigments to a sufficiently large extent during heat pressing. Fortunately, polyester is the most dependable imprintable textile against fading and degradation when used outdoors since it provides strength and UV resistance that are equivalent to those of nylon. Look for knitted or woven poly-fabrics for flags and banners.
Definitely, the clarity and gradation of photographic prints outperform those of lithography and serigraphy since the process generates continuous color tones without the use of halftone dot patterns. Photographers create amazing works of fine art on canvases made of aluminum sheets, acrylic glass, ceramic tiles, poly textiles, or by pressing their work directly into boards and wood panels to create ambient light boxes.


One Comment